How to Repurpose a Blog Post Into a LinkedIn Carousel
Repurpose a blog post into a LinkedIn carousel with a practical workflow for choosing the angle, extracting points, drafting the post, and exporting a PDF.

A blog post is usually too long for LinkedIn, but it often contains the exact material needed for a strong carousel: a problem, a point of view, supporting arguments, examples, and a conclusion. The work is not copying the article into slides. The work is choosing the right angle and turning the article into a short visual lesson.
The fastest way to do this in SlideDrift is to paste the public blog post URL, generate a carousel, review the story, edit the slides, and export as a PDF for LinkedIn. If the article is private, gated, or hard to extract, paste the important text into the notes workflow instead.
Use the blog-to-carousel angle finder when the article has too many possible directions. If you also need a text post to introduce the carousel, draft it with the LinkedIn post generator, then create the carousel in SlideDrift Create.
Direct answer
To repurpose a blog post into a LinkedIn carousel, choose one angle from the article, extract 5 to 8 key points, turn each point into one slide, write a stronger LinkedIn-style hook, add a useful final CTA, and export the result as a PDF document post.
Key takeaways
- Do not summarize the whole article. Pick one angle that can stand alone in the feed.
- A practical blog-to-carousel draft usually needs 7 to 10 slides, not one slide per paragraph.
- Use the public URL workflow when the article is easy to extract; use notes when the article is private, gated, or messy.
- Review the exported PDF before upload because LinkedIn document posts cannot be edited after the file is attached.
Why blog posts make good carousel sources
Blog posts are built for depth. Carousels are built for sequence. When you combine them well, you get a post that feels useful but not overwhelming.
A blog post usually has:
- A clear subject.
- A main argument.
- Supporting points.
- Examples.
- A conclusion.
- A call to action.
A carousel needs the same ingredients, but in a tighter shape.
The mistake to avoid
Do not turn every paragraph into a slide. That creates a slide deck nobody wants to finish.
A 2,000-word blog post should not become a 30-slide carousel. It should become one focused 7- to 10-slide post. If the article contains several ideas, create several carousels.
Step 1: Choose the angle
Most blog posts contain more than one possible LinkedIn post. Before generating or writing slides, choose the angle.
Example article: "The complete guide to client onboarding"
Possible carousel angles:
- 7 client onboarding mistakes that create scope creep.
- The 8-slide kickoff checklist we use before every project.
- Why most client onboarding documents are too long.
- Before/after: bad onboarding vs useful onboarding.
- How to turn a kickoff call into a decision map.
Each one could become a separate carousel. Do not combine all of them.
Angle finder
Worked example: one article, three possible carousels
Use this pattern before you generate the first draft. It keeps the carousel from becoming a tiny version of the full blog post.
| Source article section | Weak carousel angle | Stronger carousel angle |
|---|---|---|
| Client onboarding checklist | Everything in our onboarding process | 7 onboarding mistakes that create scope creep |
| Kickoff meeting agenda | How our kickoff call works | The 8-slide kickoff checklist before a client project starts |
| Project handoff notes | What happens after onboarding | Before/after: a vague handoff vs. a decision map |
The stronger angles are narrower, easier to title, and easier to turn into one idea per slide.
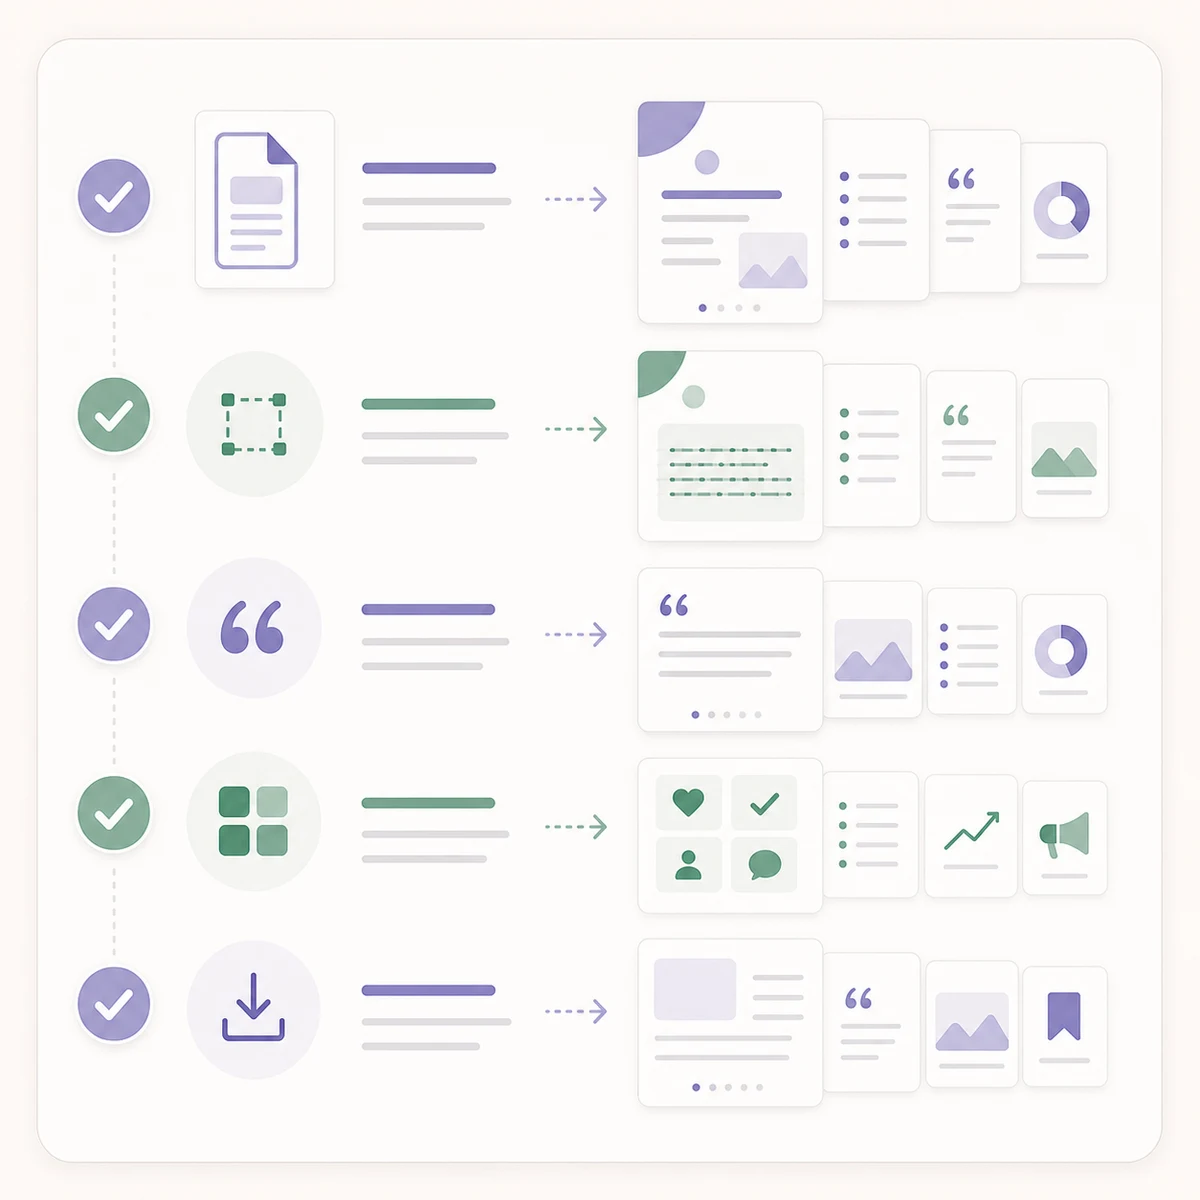
Step 2: Extract the skeleton
Read the article and pull out only the parts that support the chosen angle.
Use this extraction table:
| Blog element | Carousel role |
|---|---|
| Strong claim | First slide hook |
| Main problem | Slide 2 |
| Supporting point 1 | Slide 3 |
| Supporting point 2 | Slide 4 |
| Supporting point 3 | Slide 5 |
| Example or proof | Slide 6 |
| Practical takeaway | Slide 7 |
| CTA | Final slide |
If a point does not support the angle, leave it out. Repurposing is editing.
Step 3: Rewrite for slides
Blog writing and carousel writing are different.
Blog sentence:
Many client onboarding processes fail because the agency sends too much information too early without explaining which decisions the client needs to make first.
Carousel slide:
Onboarding fails when you send information before clarifying decisions.
Supporting line:
The client does not need more documents. They need to know what choices matter this week.
Keep the main line sharp and the supporting line short.
Step 4: Build the slide sequence
Use this default 8-slide structure:
| Slide | Content |
|---|---|
| 1 | Hook |
| 2 | Why this matters |
| 3 | Point 1 |
| 4 | Point 2 |
| 5 | Point 3 |
| 6 | Example |
| 7 | Checklist or summary |
| 8 | CTA |
Example carousel from a blog post about onboarding:
- Your client onboarding is too detailed to be useful.
- The goal is not to explain everything. It is to create momentum.
- Start with decisions, not documents.
- Define who owns each next step.
- Surface risks in week one.
- Replace the 20-page PDF with a one-page kickoff map.
- The useful onboarding checklist: role, risk, rhythm, result.
- Save this before your next kickoff call.
A blog paragraph turned into an 8-slide carousel
| Slide | Carousel copy | Job of the slide |
|---|---|---|
| 1 | Your onboarding doc is not the problem. Your decision order is. | Hook |
| 2 | Most teams send a 20-page guide before the client knows what to decide. | Problem |
| 3 | Start with the three decisions that unblock the first week. | Principle |
| 4 | Name the owner for each decision before sharing more detail. | Action |
| 5 | Then send only the documents tied to those decisions. | Filter |
| 6 | Before: 12 links in one email. After: one kickoff map with owners and dates. | Example |
| 7 | Use this check: decision, owner, date, risk, next step. | Reusable checklist |
| 8 | Save this before your next client kickoff. | CTA |

The workflow should make the article usable even for readers who skim.
Step 5: Use SlideDrift for the first draft
In SlideDrift, use the URL workflow when the article is public and readable. SlideDrift reads the source page, extracts the content, and generates an editable carousel.
If the URL is private, gated, or messy, use the text workflow. Paste the article excerpt and add direction:
Turn this blog post into an 8-slide LinkedIn carousel for agency owners. Focus on the client onboarding mistakes section. Keep it practical, direct, and useful. Do not include every point from the article.Direction matters. Without it, any AI tool has to guess which angle matters most.
Recommended workflow:
- Paste the blog post or key excerpt into the blog-to-carousel angle finder.
- Choose one specific angle.
- Use SlideDrift Create to generate the carousel.
- Draft the supporting LinkedIn caption with the LinkedIn post generator.
- Preview or format the final post before publishing.
Step 6: Add a LinkedIn caption
The caption should not repeat the carousel. It should explain why the reader should open it.
Template:
I wrote about [topic] in detail, but the most useful part is this:

[One strong sentence from the article]

I turned the idea into a short carousel covering:
-> [point 1]
-> [point 2]
-> [point 3]

Save it before [relevant action].If the caption is not clear yet, use the LinkedIn post generator to create a first draft, then tighten it around the carousel’s main promise.
Step 7: Link to the full article carefully
If you want to send people to the blog post, put the link in a comment or use a clear CTA at the end of the caption. Avoid turning the entire post into "go read my article." The carousel should stand alone.
Step 8: Export and publish
Export the carousel as a PDF, open the file, and check every slide before uploading. LinkedIn supports document posts up to 100 MB and 300 pages, but a practical carousel should be much shorter. LinkedIn Help document upload
A 5-minute review checklist
Before publishing, ask:
- Does the first slide make a specific promise?
- Did I choose one angle, not the whole article?
- Does every slide have one idea?
- Is there at least one concrete example?
- Is the final CTA useful?
- Does the caption give context?
- Did I open the exported PDF before posting?
Use the checklist before publishing the final carousel.
Final takeaway
Repurposing a blog post into a carousel is not a shortcut for lazy content. It is a way to give your best ideas a second format.
Start with one article, choose one angle, turn the strongest points into slides, and export a PDF. SlideDrift handles the draft and design so you can focus on the argument.
Start with the blog-to-carousel angle finder, draft the caption with the LinkedIn post generator, or go straight to create a carousel.
FAQ
Can every blog post become a LinkedIn carousel?
Most useful blog posts can become a carousel, but not every section should be included. Choose one angle and turn only the strongest points into slides.
Should I copy paragraphs from the blog post into the carousel?
No. Rewrite the article for a visual format. Use short slide headlines and brief supporting lines instead of paragraphs.
Can SlideDrift create a carousel from a blog URL?
Yes. Paste a public blog post URL into SlideDrift and generate an editable carousel. If the URL does not extract cleanly, paste the important text instead.
Should I link to the blog post in the LinkedIn post?
You can, but the carousel should stand alone. Use the caption or a comment to point to the full article without making the carousel dependent on the link.
How many carousels can one blog post become?
A deep article can often become several carousels if each one uses a different angle, such as mistakes, checklist, framework, case study, or myth-buster.
Turn a blog post into a carousel
Ready to make one? Start with a URL, notes, or a short outline in SlideDrift, then export the finished carousel as a PDF for LinkedIn.