How to Increase Saves on LinkedIn With Carousels
To get more saves on LinkedIn carousels, build a resource people will reuse, show it applied, end on a recap, and track saves in your post analytics.

To get more saves on a LinkedIn carousel, make it a resource your reader will need again, such as a checklist, template, framework or step-by-step process, and put the whole thing inside the slides. Name the future task on the cover, show the advice applied in at least one example, and end on a recap rather than a pitch. Then check the saves count in the post's analytics, where LinkedIn lists saves beside reactions, comments, reposts and sends.
Build the carousel around something people reuse
People save a post when they expect to come back to it, so the format is the first decision:
| Resource | Example cover |
|---|---|
| Checklist | "5 checks before you upload a carousel to LinkedIn" |
| Template | "A case study outline you can copy for your next client story" |
| Framework | "A 4-part structure for explaining a complex idea" |
| Decision guide | "Text post, image or carousel: how to choose for each idea" |
| Swipe file | "12 closing slides for professional carousels" |
| Troubleshooting guide | "Why your carousel isn't getting engagement, and what to change" |
| Step-by-step process | "How to turn one webinar into five carousels" |
Whatever the format, a resource worth keeping does three things:
- It solves a problem that comes back. The reader will face the task again, so the carousel is still useful next month.
- It's complete. The steps, criteria or examples are in the slides, not held back for a link, a download or a comment.
- It's easy to scan later. Clear headings let the reader find the slide they need without starting over.
A carousel called "Believe in yourself" gives nobody a reason to return. "A 6-part outline for your next client case study" does, because the reader can use it the next time they write one.
Plan the slides
Use this order as a starting point:
- Cover: name the resource and the task it helps with.
- Problem: show what goes wrong without it.
- Steps or parts: one per slide, in the order the reader will use them.
- Example: the resource applied to a real situation.
- Recap: the whole resource on one slide.
- Next step: ask the reader to use it. If you want to ask for a save, do it here, after the recap.
Keep each slide to one point. If a slide needs a paragraph, split it in two.
For a case study outline, that could look like this:
- Slide 1: "A 6-part outline for your next client case study"
- Slide 2: "Most case studies skip the decision that made the result possible"
- Slides 3–8: the six parts, one per slide: the situation, the problem, the decision, what changed, the result the client approved, and the lesson. Give each a one-line example from a project you can share.
- Slide 9: all six parts on one slide
- Slide 10: "Use it on your next case study"
The case study carousel guide shows how to keep each number with its context, and the carousel CTA examples show how to end on one action without crowding out the recap.
Write a cover that names the task
Use the cover to name the resource and the moment the reader will need it:
- "The checklist I run before every carousel upload"
- "A simple framework for explaining complex ideas"
- "Use this template when your case study feels flat"
- "The decision tree I use before choosing a LinkedIn post format"
- "A 9-slide carousel structure for consultants"
- "An outline for your next thought leadership post"
Skip covers that beg for saves or promise more than the slides deliver. The carousel hook examples have more first-slide lines to adapt.
Show the advice applied
An example saves the reader from working out how to use the advice later.
Weak slide: "Check your carousel before publishing."
Better slide: "Before export, check three things: one job per slide, text you can read on a phone, and a recap at the end."
The second version shows what checking looks like, so the reader can repeat it on their own carousel.
Run the five-check saveability test
Before you export, score one point for each statement that's true:
- Future task: the cover names a situation the reader will face again.
- Complete resource: the steps or criteria are inside the carousel.
- Concrete example: at least one slide shows the advice applied.
- Easy to find later: headings make the right slide quick to spot.
- Useful ending: the last slide recaps the resource instead of replacing it with a sales pitch.
Use the score to edit, not to predict results:
- 0–1: rebuild the idea around a specific future task.
- 2–3: keep the topic, and add the missing example, recap or clearer headings.
- 4–5: post it. Your audience decides whether it's worth saving, and your analytics show whether they did.
Worked example
A first draft scores 2 out of 5
Here's a seven-slide draft about LinkedIn document posts:
- LinkedIn document posts, explained
- What a document post is
- Which files LinkedIn accepts
- Size and page limits
- Why PDF is the format to use
- What you can change after posting
- Make your next carousel with our tool
It passes complete resource and easy to find later: the facts are in the slides, and each heading says what its slide covers. It misses the other three. The cover names a topic rather than a task, no slide shows the advice applied, and the last slide is a pitch instead of a recap.
The revision turns the same facts into a checklist for the moment before upload. The facts on slides 2 to 5 come from LinkedIn's help page on document posts.
- 5 checks before you upload a carousel to LinkedIn
- Export a PDF. LinkedIn also takes PowerPoint and Word files, but recommends PDF for the best quality.
- Keep the file to 100 MB and 300 pages at most.
- Add a document title.
- Open the PDF and check slide order, edges and spelling. You can edit the post's description later, but not the document.
- Read the smallest text on your phone.
- Example: a footnote cut off at the page edge, before and after the fix.
- Recap: all five checks on one slide.
The revision scores 5 out of 5: the cover names a task, every check is there, slide 7 shows one applied, the headings are easy to scan, and it ends on a recap. That doesn't guarantee saves. It gives the reader a reason to come back the next time they upload a PDF.
The LinkedIn document posts guide covers the format in full.
Make one in SlideDrift
Start with what you already have: notes, an article, a process doc or a rough framework. Paste the text into SlideDrift, or paste a link on its own line and SlideDrift reads the page. Then say what the carousel is for:
SlideDrift brief
Turn the notes below into a LinkedIn carousel that works as a checklist for [audience] to use before [task].
Cover: name the task and who the checklist is for.
Middle slides: one check per slide, in the order the reader will do them. Show one check applied as an example.
Last slide: every check on one slide, as a recap.
Tone: practical and plain. Make no claims the notes don't support.

[Paste your notes here]SlideDrift makes 7 slides unless you change the count in Preferences, which offers 5 to 12; text in the box doesn't set it. Press Generate, then edit the draft against the five checks: cut generic slides, sharpen the example, and make sure the recap works on its own. When it's ready, click Share, then Export, then Download PDF, and open the file before you upload it.
Make a checklist carousel from your notes
Paste your notes, an article or a process doc. SlideDrift drafts the slides; you edit them, then export the PDF for LinkedIn.
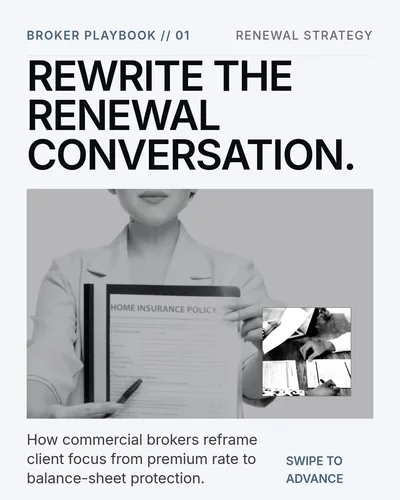


Before you post, run the LinkedIn carousel checklist as well.
Measure saves after you post
For posts from your own profile, LinkedIn's post analytics show saves alongside impressions, members reached, reactions, comments, reposts, sends, profile viewers, followers gained and link visits. LinkedIn says these numbers are estimates, so look for clear differences rather than small ones. Posts from a LinkedIn Page are measured differently: Page content analytics report impressions, members reached, clicks, reactions, comments, reposts and engagement rate.
To read the saves count:
- Compare saves with reach. Twenty saves from 1,000 members reached is a stronger signal than twenty from 10,000.
- Compare like with like. Put checklists beside checklists, and note what changed in the cover, the example and the last slide.
- Judge a format over several posts. One carousel can do well or badly for reasons that have nothing to do with its format.
- Look at what else happened. Sends, comments, profile viewers and followers gained show whether people did more than keep it for later.
A carousel can reach fewer people and still be saved more often, which can mean it was useful to a smaller group. Check it against the goal you set for the post before you call it a win or a miss.
FAQ
Where can I see how many people saved my LinkedIn post?
In the post's analytics. For posts from your profile, LinkedIn lists saves with impressions, members reached, reactions, comments, reposts, sends, profile viewers, followers gained and link visits, and says the figures are estimates. LinkedIn Page analytics report a different set of metrics.
What kinds of carousels get saved?
Ones the reader expects to use again: checklists, templates, frameworks, decision guides, swipe files and step-by-step processes. Put the useful part inside the slides and show it applied in an example.
Should I ask people to save my carousel?
You can, once you've given them something worth keeping. Put the request on the last slide, after the recap, and let the cover name the task instead.
How many slides should a saveable carousel have?
As many as the resource needs. A five-point checklist with an example and a recap fits in eight slides. SlideDrift drafts 7 by default, and you can pick 5 to 12 in Preferences before you generate.
Are saves more important than likes?
Not on their own. A save suggests someone plans to come back, while a reaction is a response in the moment. Neither tells you whether the carousel did its job, so read both against the goal you set for the post.