How to Repurpose a LinkedIn Carousel Into a Newsletter
Use the slides as your outline: rewrite slide 1 as the subject line, expand the strongest slides, cut the transitions and end with one next step.
To repurpose a LinkedIn carousel into a newsletter, treat the slides as your outline and write what they had no room for. Rewrite slide 1 as the subject line, open with why the topic matters, expand the two or three most useful slides into short sections with their reasons, examples and sources, and replace transition slides with a sentence each. End with one takeaway and one next step.
The steps are the same for an email newsletter and a LinkedIn newsletter, and a worked example follows them.
What changes between a carousel and a newsletter
| Part | Carousel | Newsletter |
|---|---|---|
| Opening | A cover slide that has to stop the scroll | A subject line, then a few sentences of context |
| Structure | One idea per slide | Short sections joined by transitions |
| Detail | Cut to fit the slide | The reasons, examples, sources and caveats |
| Images | Every slide | One or two, only where they help |
| Ending | A final slide | One takeaway and one next step |
| What the reader does | Swipes, saves, comments | Reads, clicks, replies, forwards |
Start by copying the text of each slide, in order, into a doc. That's your outline. If you made the carousel from notes, an article or a call summary, open that source too. It holds the detail you cut to fit the slides, and that's where most of the newsletter's extra words should come from.
Step 1: Rewrite slide 1 as a subject line
A cover slide has to stop someone scrolling a feed. A subject line has to tell someone in their inbox what they'll get by opening. Rewrite the hook so it names the problem or the payoff:
| Carousel cover | Newsletter subject line |
|---|---|
| "7 mistakes agencies make with carousels" | "The carousel mistake that makes client work harder" |
| "How to turn notes into a carousel" | "What to cut from your notes before you make slides" |
| "Why your carousel gets no engagement" | "Why useful posts still get ignored" |
For a LinkedIn newsletter, the same rewrite becomes the edition's title.
Step 2: Write the opening the slides skipped
Slides usually start at the point. A newsletter can first spend two or three sentences on what prompted the topic, who it's for and what the reader will be able to do by the end. Keep it short. The reader opened the email for the idea in the subject line, so reach it by the second paragraph.
Step 3: Expand the two or three most useful slides
A carousel usually has a few slides that carry the lesson and several that set them up. Pick the ones a reader would act on. If the carousel is already posted, read its comments for the slides people asked about. Give each of those slides a short section:
- The point, in one sentence.
- Why it happens, or why it matters.
- What to do instead.
- An example, a source or a caveat.
A newsletter has room for the evidence a slide had to drop. When a slide states a fact, name its source in the sentence and link to it. Slides that only restate another slide can shrink to a sentence, or go.
Step 4: Replace transition slides with sentences
Some slides only keep the swipe going: "Here's the framework", "Let's break it down", "The takeaway". In an email they read as padding. Cut them, and where the reader needs a bridge, write one line, such as "The format is the easy part. The next check takes more care."
Step 5: End with one takeaway and one next step
Give the reader something to use the same day: a short checklist, a question for their team, a template, a decision rule or a prompt.
Then ask for one thing. Don't ask the reader to book a call, read three links, reply, follow you and try a tool in the same email. Pick one:
- "Reply with the carousel you're about to post."
- "Read the full checklist on the blog."
- "Forward this to whoever uploads your team's posts."
Step 6: Add slide images only where they help
Assume the reader hasn't seen the carousel, so the issue has to make sense without it. Add a slide as an image only when it carries something words can't, such as a chart or a framework, and check that the email still reads well if the images don't load.
If you made the carousel in SlideDrift, you can download just those slides. In the editor, click Share, then Export, choose PNG, and untick the slides you don't need, or choose This slide. SlideDrift downloads them as PNG files in a ZIP, as the PNG export guide explains.
Worked example: one carousel, one newsletter issue
Here's the method applied to a seven-slide carousel about checking a LinkedIn document post, the post type a carousel is uploaded as.
| Slide | Carousel text | In the newsletter |
|---|---|---|
| 1 | "3 checks before you post a carousel PDF" | Subject line: "You can't swap a LinkedIn carousel after you post it" |
| 2 | "You can edit the text later. Not the file." | The opening: why the checks come before posting |
| 3 | "Upload a PDF" | Section 1, with the file types LinkedIn accepts |
| 4 | "Stay within 100 MB and 300 pages" | Half a sentence in section 1 |
| 5 | "Read every page of the export" | Section 2, with the reason: viewers can download the file |
| 6 | "Add a document title" | A line in the takeaway |
| 7 | "Save this for your next upload" | Cut; the takeaway and one next step replace it |
Worked example
The newsletter version
Subject line: You can't swap a LinkedIn carousel after you post it
Opening: LinkedIn's help page on document posts says you can edit a post's description after it goes live, but not the document. A typo on page 5 stays on page 5, so these three checks happen before you post.
1. Upload a PDF. LinkedIn accepts PDF, PPT, PPTX, DOC and DOCX files of up to 100 MB and 300 pages, and recommends PDF for the best quality. Export the carousel as a PDF and upload that file.
2. Read the exported file, not the editor. Viewers can download a document post as a PDF, so the file is what people keep. Open it and check the page order, the edges of each slide and anything you didn't mean to share.
Takeaway: before each upload, confirm the file is a PDF, read every page and add a document title.
Next step: "Read the full pre-posting checklist on the blog."
Slide 4 shrank to half a sentence, slide 6 became a line in the takeaway, and slide 7 went. The space went to the reason behind each check and the source the slides had no room for.
Publishing it as a LinkedIn newsletter
A LinkedIn newsletter is a series of articles, so the steps don't change: the rewritten hook becomes the edition's title, and the sections go into the article editor. LinkedIn's newsletter FAQ says all members can create a newsletter, and subscribers are notified about each new edition in the app, by push notification or by email. Pages are assessed separately: LinkedIn's access criteria ask for more than 150 followers or connections, experience creating original content and a record in good standing.
The article editor gives you two ways to bring the carousel in. LinkedIn's help page on article media lists PNG among the image types an article accepts, and lets you embed a LinkedIn post by pasting its link. Add a slide or two as images, or embed the original carousel post for readers who want to see it.
Going the other way: a carousel from a newsletter issue
If you write the newsletter first, run the mapping backwards: the subject line becomes the cover, each section becomes a slide or two, and the opening context and transitions get cut. Open Create in SlideDrift and paste the issue with a short instruction:
SlideDrift brief
Make a LinkedIn carousel from the newsletter issue below for [audience].
Goal: teach the one idea in the subject line.
Slides: the problem, why it matters, one slide per main point, a short checklist, one next step.
Keep each fact with its source. Make no claim the issue doesn't support.

[Paste the newsletter issue here]Click Generate, then edit the slides before you export the PDF. The number of slides comes from Preferences, not from the text you paste. If the issue has a public web page, you can paste its link on its own line instead; if the page can't be read, paste the issue's text. For more on what to cut, see how to repurpose a blog post into a LinkedIn carousel.
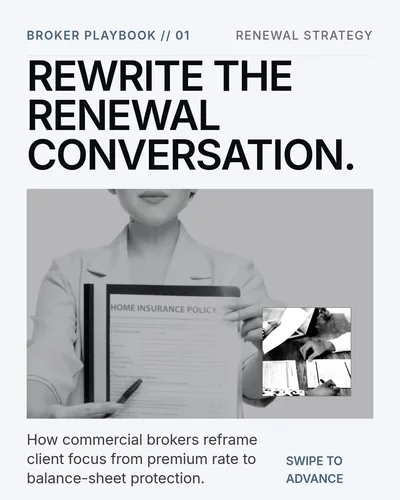
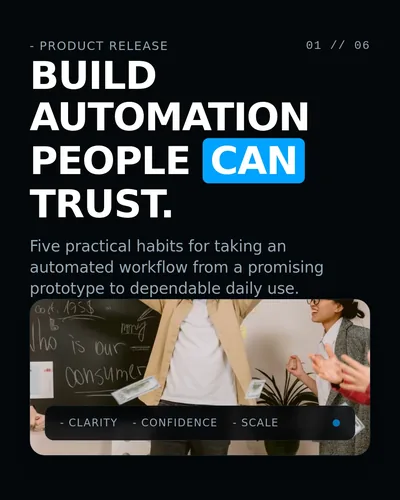
Make a carousel from a newsletter issue
Paste an issue you've already sent. SlideDrift drafts the slides; you edit them, then export the PDF for LinkedIn.
Check the issue before you send it
- Does the subject line name a real problem or payoff?
- Does the opening sound like you, not like slides pasted into an email?
- Did the most useful slides get the extra space?
- Does every fact name its source?
- Is there one takeaway and one ask?
- Does it make sense to someone who never saw the carousel?
The carousel needs its own check before it goes out: use the LinkedIn carousel checklist. If the topic also deserves a page people can find in search, the carousel-to-blog-post guide uses the same slide-to-section mapping.
FAQ
Can I paste my carousel slides straight into a newsletter?
You can, but it reads like captions without the pictures. Slides are cut down for swiping, and a newsletter reader expects the reasons, examples and sources the slides left out. Use the slides as the outline and write the sections around them.
Should the newsletter include the carousel images?
Only the one or two slides that carry a chart or a framework, and the issue should make sense without them. In SlideDrift, you can download selected slides as PNG files from Share, then Export.
Does this work for a LinkedIn newsletter?
Yes. LinkedIn newsletter editions are articles, so the rewritten hook becomes the edition's title and the sections go into the article editor, where you can add slide images or embed the original carousel post.
Should the carousel or the newsletter go out first?
Either works. Posting the carousel first lets you expand the slides people asked about in the comments. Sending the newsletter first gives you the full version to cut down into slides.